WHAT IS THE RIGHT LAYOUT FOR YOUR BLOG?

Right structure or layout is important for any blog or site. On my blog I have a three-column layout. But the site is still just one column. I don’t necessarily mind a three column layout as long as it remains clean & streamlined. but, if it gets too busy then it won’t be a pleasant experience. And, making your blog pleasing to the eye is one of the keys to keeping your readers engaged and coming back.

Here I am presenting some correct layout:-

One column layout


There isn’t a lot of variation for a one column layout, the content is front and center.


Two column layout


The two column layout can be displayed like the image above content/sidebar. And, you could also switch it up and go sidebar/content. Which ever fits your flow is going to be the best decision.


Three column layout


The three column layout offers the most flexibility, but like I mentioned before be careful the “look” of your blog doesn’t get too busy or overwhelming. The image above is set up as sidebar/content/sidebar, but you could also do content/sidebar/sidebar, or sidebar/sidebar/content.

You could also separate out the footer into two or three columns to add more room for widgets. And, you could also swap the menu & header areas.

How to Remove Blogger Navigation Bar (Navbar)

Blogger show a navigation bar by default at the top of every blogger blog. It’s called navbar (Navigation Bar). Navigation is not bed it may be useful. But sometime we need to remove this navbar because it does not look professional. The Blogger navbar is mostly hidden in in third party blogger templates. Now i will show you that How to Remove Blogger Navigation Bar (Navbar). Just follow the instruction.

There are some advantages of Navbar:-
When you click on the B icon, it will take you to blogger.com
a quick link to your Dashboard and "Sign in /Sign out" dialog
You can easily search for other blogs
Next Blog - takes you to a random, recently-updated Blogger blog

The disadvantage of navbar is If you have customized design, Navbar doesn't adjust with design for looking wise.
Process:-
1. Hiding of Navigation Bar is very easy. You have to add small CSS code in your blogger template.
2. Go to your Blogger dashboard
3. Click on > Template >Edit HTML
4. Now find “]]></b:skin>” and just before this code pase above given CSS.
5. Now save your Template and refresh your blog and see blogger navbar has been removed. 

Add below given CSS in your blogger template:-


Finally, Problem solved!
Now you can Remove Blogger Navigation Bar (Navbar)
Congratulations!
If there any problem, don't hesitate to contact me

How to change mouse cursor pointer in blogger

Change mouse cursor in blogger blog with fancy or cut cursor. You can use animated cursor according to your blogger design. Change your pointer with your favorite image to make your blog more stylish. It’s very easy to change mouse point in blogger or BlogSpot blog. Many blogger ask this question how to use custom mouse pointer in blogger blog. So today am writing this post to guide all my blog reader. Customize your blog by changing mouse cursor. Now i will show you that How to change mouse cursor pointer in blogger. Just follow the instruction.

Process:-
1. Login to your blogger Account
2. Select your Blog.
3. Click Template
4. After this Click to Edit HTML option.
5. Now Find “]]></b:skin>”Code By pressing Ctrl+F.
6. Now exactly before it, add the below any Cursor Design Code which you like.
7. Now Click Save Template Button.


Some Cursor Design is Given Which you like Copy Code and past It Before]]></b:skin>

Design 1:-

Design 2:-


Design 3:-


Design 4:-

Design 5:-


Design 6:-


Design 7:-


Finally, Problem solved!
Now you can change mouse cursor pointer in blogger
Congratulations!
If there any problem, don't hesitate to contact me

How to Add Back To Top Button in Blogger With Smooth Scrolling

It is the time to forget old way pressing scrolling button for go to the top of the page and it’s take long time to reach to top of the page. Just add a new smooth back to top button. It’s very cool widget for blogger. Suppose your webpage is very long and user wants to go in the top of the page. In that case it’s a best way to adding a smooth scrolling button for again go to the top.Now i will show you that how to Add Back To Top Button in Blogger With Smooth Scrolling. Just follow the instruction.

Process:-
1. Go to Blogger
2. Take Backup of your Blog Template
3. Go to Template > Edit HTML > search for the <head>
4. just below/after the <head> tag place this bit of code: and save template 

note: you may already have a jquery script in your blog’s template, if you are using Jquery Script on your blog then skip process no. #3 and #4

5. Now go to Layout > click Add a Gadget > select an HTML/Javascript
6. Copy and paste the code below into the content section.


7. Now save.
note: You can change the Back To Top button by replacing the Image URL which is at the end of the code

Here some Image URL with different Back To Top button:-

http://www.carrieloves.com/wp-content/uploads/2015/02/back-to-top.png


https://blogger.googleusercontent.com/img/b/R29vZ2xl/AVvXsEgGkzv_0zhroWQgbIiqo_BIdXR5EW7X8gbCJqx49TdrynT47hVGfQy4VCxJ81ftWIQ5GE3G0P2vu3vNDGcPnCBKWDbH5RPP1Jj-3aPfX4zlFRhyWYJaUDhH6l9fW0v_WWlujfId4s9WPWd_/s1600/back+to+top+.png

Finally, Problem solved!
Now you can Add Back To Top Button in Blogger With Smooth Scrolling.
Congratulations!
If there any problem, don't hesitate to contact me

How to Add code box area in Blogger

Did you ever wondered how to add code boxes on your blogger post? There are two ways, one is a simple method which is best suited for beginners (like me) and the other is the advanced method which gives your code box a more professional look but requires a little source tweaking. But here i am shearing the 1st method that is quite easy to apply. Basically code box separate the HTML code from the other text. It seems nice and easy to understand the code. Now i will show you that How to Add code box area in Blogger. Just follow the instruction.

Process:-
1. From blog post click on HTML

2. Now copy & paste the following code
<textarea name="textarea" cols="40" rows="4" wrap="VIRTUAL">
YOUR CODE
</textarea>
3. Now save and view.

note: the code box will appear like the above
Just replace your html code with YOUR CODE
You can also increase the row number by change it.


Finally, Problem solved!
Now you can Add code box area in Blogger.
Congratulations!
If there any problem, don't hesitate to contact me

How to Add Page Number Widget for Blogger

Suppose you have 100 of page in your blogspot and you do not have page number navigation widget in your blog then you have only older post button & newer post button. To visitor know how many page you have in your blog It is necessary a page navigation. And second thing is this somebody want to go to page number 15 if you use this widget by using page number navigation they can easily jump on page number 15. So this widget makes easy to access your sites or blogs post. Now i will show you that How to Add Page Number Widget for Blogger. Just follow the instruction.
Process:-
1. Sign in to your blogger account
2. Now Go to blogger layout option.
3. Select add Gadget option
4. Select “HTML/JavaScript” Gadget 
5. Now copy and past below given Java Script in HTML/JavaScript content box
6. Now click on save
7. . Now drag this widget just below of blogger posts section 
8. Now use and enjoy

Here given some page navigation style:-


Finally, Problem solved!
Now you can Add Page Number Widget for Blogger
Congratulations!

How to flash stock rom for all Symphony phone

This is for Symphony xplorer phone user. Now you can install stock rom in your phone very easily. It is a simple process for flashing android phone. Why flashing is required? Sometimes we tried to update phone or install custom roms. If there any problem with updating or installing custom Rom, Update, Root or CWM recovery then phone become brick it means phone is unable to use. It is expensive and time consumed to recover the phone. So here is the process that can help you to recover any symphony bricked phone. Now i will show you that How to flash stock rom for all Symphony xplorer mobile phone. Just follow the instruction.

Requirements:- Your Android Smartphone should have more than 50% of battery for Flashing Process. Do not flash your phone when it is out of charge.

Solution:-
Files need to be downloaded:-
1. Driver
2. Stock rom
3. Flash tool
Password:- jabadbd24.blogspot.com

Process:-
1. Download and install Android USB Drivers on your computer.
2. Power Off your Android phone and remove the Battery
3. Download the Stock Rom that you want to Flash  and extract it on your Computer
4. Download and Extract SP Flash Tool. After Extracting you will see the following
5. Now double click Flash_tool.exe
6. Click on the Scatter-Loading Button from the Right sight
7. Now select the Scatter File (the file is in the Stock Rom folder)
8. Now, Click on the Download Button to start the Flashing Process
9. Now, Connect your mobile phone with the Computer using USB Cable
note: After connecting mobile to the computer, Press Volume Down or Volume Up key to easily detect your phone
10. Once Flashing is finished, a Green Ring will be shown
11. Close the SP Flash Tool and disconnect phone from computer
12. Now use and enjoy

Finally, Problem solved!
Now you can flash stock rom in your symphony xplorer  phone
Congratulations!
If there any problem, don't hesitate to contact me

How to Remove Microsoft Excel Password

Today i am going to share an important tutorial about microsoft excel. We all know what is microsoft excel. Microsoft excel is an office application. Basically we use microsoft excel for making worksheet, Accounting file, Computing etc. Sometimes we use password in microsoft excel worksheet to protect them. If we forget the password then it is unable to access the worksheet. Sometimes we lost password unfortunately. But do not worry. Here is the tricks to remove microsoft excel massword. Now i will show you that How to Remove Microsoft Excel Password. Just follow my instructions.

Solution:-
Files need to be downloaded:-
1. Excel Password Recovery Lastic
Password:-  jabadbd24.blogspot.com
Process:-
1. Download the file
2. Install Excel Password Recovery Lastic software in computer
3. Then run Excel Password Recovery Lastic
4. Click on open and select the excel file

5. Click on crack and wait

6. You will get an another excel file without password

note: It is required internet connection
7. Now use and enjoy

Finally, Problem solved!
Now you can Remove Microsoft Excel Password!
Congratulations!
If there any problem, don't hesitate to contact me

Download Fifa 15 Hd game for Android

Fifa 15 is a common and most played android football game. There are different versions of this game is available for symbian and java and android phone. This is a HD version that is for android device such as phone or tablet. The main features is that all types of android phone and all screen sized device is able to install Fifa 15 game. There are various control to play this game. There are also several different levels and stages for players. Players can select the difficulty level to play in hard or easy mode. players need multi touch enable phone to play this game. Without multi touch device only one button will work at a time. To play it perfectly Multi touch is important so that user can play this game without any problem. Now i will show you that How to install and play Fifa 15 game in your android phone. Just follow the instruction.
Features:-
Full version game
Easy to Control the game
Beautiful graphics included
More than 10000 players available
500+ different team available
More than 30 stadium in different country
Lots of different environment

Solution:-
Files need to be downloaded:-
Password:-  jabadbd24.blogspot.com

Process:-
1. Download Apk file in your mobile
2. Then download Data file
3. Install apk file in your android phone
4. Now extract data file by winrar or 7-zip software
note: After extract you will see a folder named "com.ea.game.fifa15_row"
5. Now connect your phone with computer
6. Copy "com.ea.game.fifa15_row" folder to sdcard/android/obb
7. Now play and enjoy

Finally, Problem solved!
Now you can install and play Fifa 15 game in your android phone or tablet!
Congratulations!
If there any problem, don't hesitate to contact me

How to root and unroot Symphony xplorer W66 and W68

It is a good news for Symphony xplorer w66 and W68 device user. Now you can get root and unroot access in your phone by this tutorial. this is the simple and common process for rooting but 100% working. After rooting  the phone an android user can access all facilities of their android phone. Root enables to install all applications and games. Rooting is important for more advanced operations in device. For example like as modifying or customizing or deleting system files, removing default installed applications (known as build in applications), and other high level access. Rooting installs a Superuser apps. It will monitors all other applications. And also grant the superuser rights. It is compulsory to access advance features of phone. After rooting the phone your can also unroot. Now i will show you that How to Root and Unroot Symphony xplorer w66 and W68. Just follow the instruction.
Solution:-
Files need to be downloaded:-
Password:- jabadbd24.blogspot.com

Root and Unroot is a advance task. If you do not know about Root then do not try this. If you follow our process correctly you can do it. So do it at your own risk.

Process:- Root
1. Download the framaroot.apk from the link above
2. Install the framaroot.apk on your phone
3. Go to settings>all setting>developer option>USB debugging. Click on the check box to enable usb debugging
4. Open the framaroot application and Select install super SU
5. Now Click on boromir
6. Now reboot the android device
note: you will see the super SU application in applications list. Now the Android phone is rooted. Sometimes this process do not work at first time. In that case please do the same process again

Process:- Unroot
1. Open the framaroot apps and Select unroot
2. Now Click on boromir
3. Now reboot the android device

Finally, Problem solved!
Now you can Root and Unroot your Symphony xplorer w66 and W68
Congratulations!
If there any problem, don't hesitate to contact me

Slim Fresh Custom ROM for Walton Primo EF2

Slim Fresh V9 is a Custom ROM for android operating system designed for some specific model of android Phone. Slim Fresh V9 Custom ROM is created  for Walton Primo EF2, created by android developer named Shakil Khan. New features and updated system applications are included in this custom rom. This is a beautiful rom. The rom is speedy than default operating systems and have many uncommon and different features. The most advantage of this custom rom is less charge consumed. You will definitely like this Custom Rom because of its different outlook. Now i will show you that How to Install Slim Fresh V9 Custom ROM in your Walton Primo EF2. Just follow the instruction.
New Features:-
• Good Ram Management
• 600+ RAM free
• Better Camera Quality
• Improve Battery Backup
• Double Camera
• CPU Controller added
• New Wallpaper & Sounds
• Many customized App
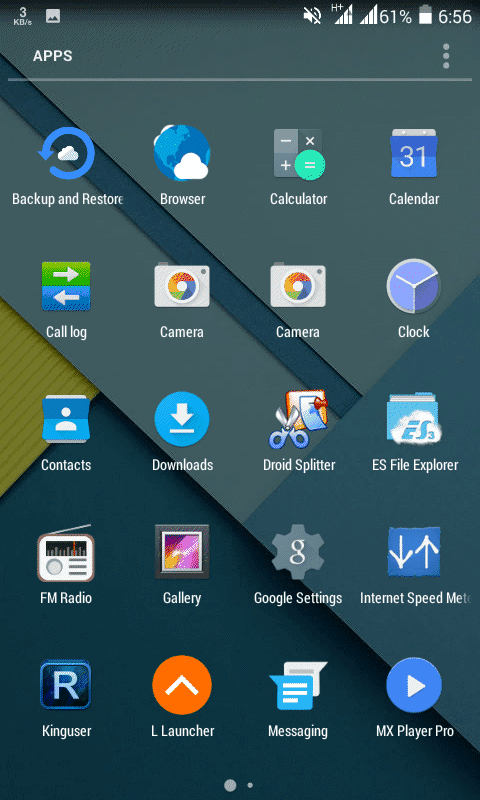
• Lollipop Launcher
• Floating Button
• Gravity box Supported
• Latest Google Applications
• All GPS Supported
• High score in Antutu Benchmark
• HD Game Running Smoothly Without Any Lag

Solution:-
Files need to be downloaded:-
1. Slim Fresh V9
Password:- jabadbd24.blogspot.com

Warning:- Before installing this custom rom confirm that you have root and install CWM in your phone. We are not responsible for any kinds of damage done by you.
To root and install CWM recovery please follow this link

Process:-
1. Download the file
2. Now copy Slim Fresh V9 zip file in your SD card
3. Then switch off your phone
4. Press and hold volume up+power button+Home together
note: format system, data and cache before install the rom
5. Select update from SD
6. Now select the Slim Fresh V9 zip file and select yes
note: It will take approximately 15 minute to install
8. Then restart your phone
7. Now use and enjoy

Finally, Problem solved!
Now you can install Slim Fresh V9 Custom ROM in your Walton Primo EF2!
Congratulations!
If there any problem, don't hesitate to contact me

Kaspersky Internet Security for Android

Kaspersky Internet Security is a advance level application that is used against virus. This is available for Android devices. It is also for computer but this file is only for android. It provides security technologies to protect android devices. Anti-theft protect phone from steel. Antivirus technology used by Kaspersky Mobile Security is very strong.  This app can protect your devices from threats and virus. The threats received from internet protected. This application is totally free of cost to protect your android devices. It have also some different major features. Now i will show you that how to install Kaspersky Internet Security in your android phone. Just follow my instructions.

Features:-
It protects device from threats, viruses, Trojans
This app runs antivirus scanner to scan you device
It provides Anti-Theft Protection
It consist of a new Alarm feature
This alarm can be turned into silent mode easily
Able to manage anti-theft web management by using online account
Solution:-
Files need to be downloaded:-
1. Kaspersky Internet Security
Password:-  jabadbd24.blogspot.com

Process:-
1. Download the apps
2. Install the Kaspersky Internet Security software in android phone
3. Now open and configure apps
4. Then restart your phone
5. Now use and enjoy

Finally, Problem solved!
Now you can install Kaspersky Internet Security in your android phone!
Congratulations!
If there any problem, don't hesitate to contact me

Emotion v3 custom Rom for Walton Primo EF2

Emotion v3 is a custom Rom. It is a smart operating system of android. The custom rom is cteated and designed for specific version of android phone. Emotion v3 custom Rom designrd for Walton Primo EF2 created by android developer Mr. Shakil Khan. Different features and updated system applications are imported in this rom. It is a beautiful rom for android operating system. It is faster than other rom and brings many new features. This custom rom is it is less charge consumed. You will like this rom because of its different features, interface and outlook. Now i will show you that How to Install Emotion v3 custom Rom in your Walton Primo EF2. Just follow the instruction.
New Features:-
Improve Ram
Double Camera
All HD Game Running
Improve performance
GPS Supported
100% Bug Free Rom
Good view
Dolby Digital Plus sound Supported
Added List View Animation
Uncommon Wallpaper & Sounds added

Solution:-
Files need to be downloaded:-
1. Emotion v3
Password:- jabadbd24.blogspot.com

Warning:- Before installing custom rom, make sure that you have root and install CWM or any other recovery in your phone. We are not responsible for any kinds of problem for your mistake.
To root and install CWM please follow this link

Process:-
1. Download the file
2. Now copy Emotion v3 zip file in your SD card
3. Then switch off your android phone
4. Press and hold volume up+power button+Home together
note: format system, data and cache before install the rom
5. Select update from SD
6. Now select the Emotion v3 zip file and select yes
note: It will take approximately 15 minute to install
8. Then restart your phone
7. Now use and enjoy

Finally, Problem solved!
Now you can install Emotion v3 custom Rom in your Walton Primo EF2!
Congratulations!
If there any problem, don't hesitate to contact me

Lollipop custom Rom for Walton Primo EF2

Lollipop custom Rom is a rom for android operating system. Modified and designed for specific model of android device. Lollipop custom Rom is customized for Walton Primo EF2 and created by android developers one of them is Shakil Khan. He also created some other android rom. Updated system applications are present in this rom. In this rom there are new features available. It is a beautiful operating system. It is less time consumed than other operating systems rom. The rom has many uncommon facilities. The lollipop custom rom is less charge consumed. This rom have totally different outlook. Now i will show you that How to Install Lollipop custom Rom in your Walton Primo EF2. Just follow the instruction.
New Features:-
Dual sim 3G enable
Lollipop
All GPS Supported
More than 600+ Free RAM
Better Camera
HD Game Running Smoothly Without Lag
Xposed Supported
Lenevo Camera Supported
Stable Rom
List View Animation
Beautiful  Wallpapers

Solution:-
Files need to be downloaded:-
1. Lollipop
Password:- jabadbd24.blogspot.com

Warning:- Before installing custom rom make sure that you have root and install CWM. We are not responsible for any kind of damage for your mistake.
To root and install CWM please follow this link

Process:-
1. Download the rom
2. Now copy Lollipop zip file in your SD card
3. Then switch off your phone
4. Press and hold volume up+power button+Home together
note: format system, data and cache before install the rom
5. Select update from SD
6. Now select the Lollipop zip file and select yes
note: It will take approximately 15 minute to install
8. Then restart your phone
7. Now use and enjoy

Finally, Problem solved!
Now you can install Lollipop custom Rom in your Walton Primo EF2!
Congratulations!
If there any problem, don't hesitate to contact me